What should you expect?
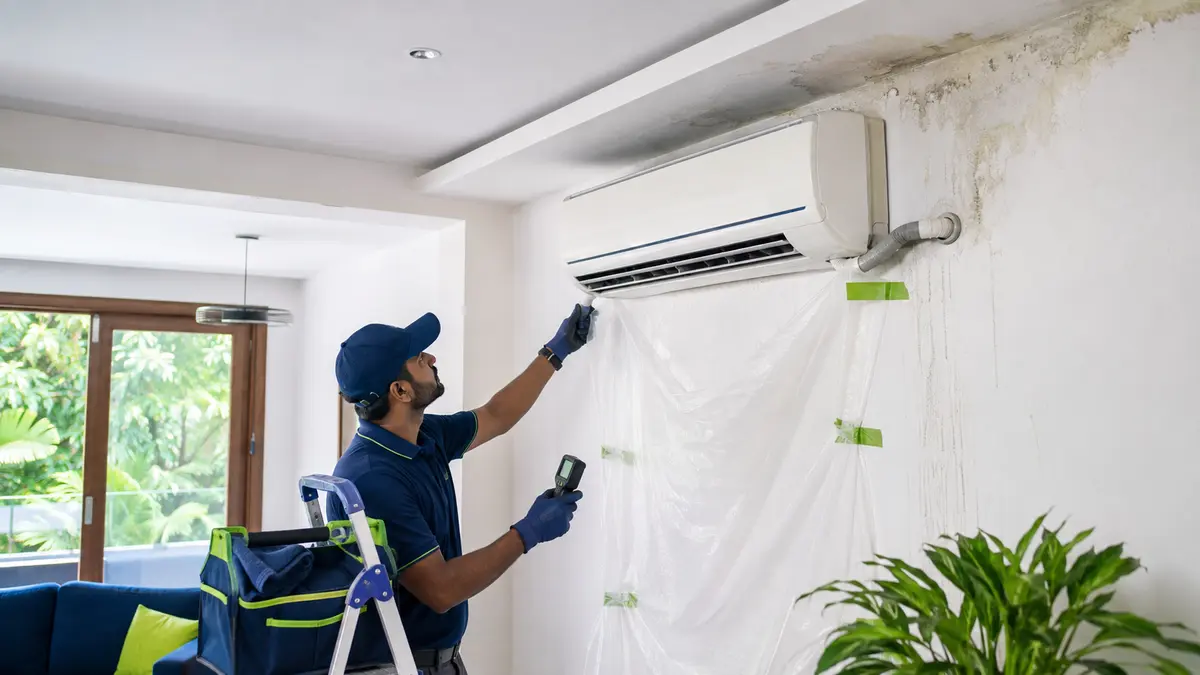
If water is appearing from an AC, switch the unit off when leakage is heavy, near electrical fittings or causing a ceiling to sag, protect the area and arrange inspection. The cause may be a blocked or poorly sloped drain, loose connection, dirty drain pan, failed condensate pump, cracked insulation, frozen coil or rain entering the route. Repair the moisture source before repainting.
Find whether the water is condensate, pipe sweating, ice melt or rain
Hot-humid weather creates substantial condensate, while monsoon rain can expose poor wall penetrations and outdoor drain terminations. Pondicherry and Cuddalore sites need both condensate control and weather sealing checked.
Water location and timing matter. A leak only while cooling suggests condensate; droplets along the copper casing suggest damaged insulation; water after the unit stops may be ice melt; rain-related staining may come through an unsealed penetration.
High humidity increases condensate volume and makes exposed cold surfaces sweat. Drain slope, insulation vapour sealing and outlet position therefore deserve verification under sustained operation—not only a quick start-up.
What the leak pattern can tell you
Water from indoor unit
Inspect drain pan, outlet, hose connection, blockage, unit level and evaporator cleanliness.
Wet pipe casing or trunking
Look for crushed, open or waterlogged insulation and unsealed joints around cold copper.
Ceiling cassette leak
Check pump operation, float switch, pan, filter and discharge lift against the unit instructions.
Stain after rain
Inspect wall sleeve slope, sealant, outdoor pipe entry and drain termination for wind-driven water.
A complete AC drainage inspection
Drain pan and outlet
Check for dirt, algae-like buildup, cracks, corrosion and secure connection.
Continuous fall
Gravity drains need the manufacturer-required downward route without rises or sagging water pockets.
Trap and vent
Where system pressure or layout requires them, traps and vents must follow the equipment design.
Condensate pump
Test lift, float, check valve, alarm or interlock and accessible cleaning points.
Hose and fittings
Replace split, hardened, crushed or loosely joined drain components with suitable material.
Pipe insulation
Restore continuous closed-cell insulation and sealed vapour joints around cold refrigerant lines and drain sections as required.
Wall penetration
Seal and weatherproof the sleeve while preserving correct outward fall and serviceability.
Full-load drain test
Introduce and observe water using the manufacturer method, then run the system long enough to verify flow and no hidden leakage.
Common AC water patterns and likely checks
Do not assume every wet mark is a blocked drain. The table is a starting point, not a substitute for opening the correct access panels safely.
| Water pattern | Likely area | First professional check |
|---|---|---|
| Drips from indoor casing | Pan, hose, level or blockage | Inspect pan and prove drain flow |
| Sweat on trunking | Insulation or air leakage | Inspect vapour seal and cold surfaces |
| Leak after icing | Airflow, control or refrigerant fault | Diagnose why the coil froze |
| Monsoon-only stain | Penetration or rain entry | Waterproof route and outward fall |
Dry and repair finishes only after the leak is proven stopped
Wet gypsum, false ceilings, timber, insulation and paint may retain moisture after the AC stops leaking. Building repair should include safe drying and assessment of damaged materials.
- Photograph the affected area before opening it.
- Keep people away from a sagging ceiling.
- Isolate nearby electrical risk through a qualified person.
- Confirm moisture reduction before closing or repainting.
- Retest drainage after the building repair.
From water leak to verified repair
- 1
Make the area safe
Stop operation if water threatens electrics, people, furniture or a weakened ceiling.
- 2
Trace the source
Match timing and water path to drain, insulation, icing or rain-entry causes.
- 3
Correct the root fault
Clean, re-route, seal, insulate, level or repair the affected component.
- 4
Prove drainage
Complete a controlled drain test and sustained cooling run while inspecting concealed paths.
- 5
Dry and restore finishes
Assess retained moisture and repair wall or ceiling materials only after the source is controlled.
Prevent drainage damage in new AC installations
Plan the drain before the indoor unit position is final. A short gravity route with continuous fall and accessible cleaning points is usually more robust than a concealed route with multiple rises.
Where a pump is unavoidable, provide accessible maintenance, overflow protection and an alarm or shutdown response appropriate to the consequences of failure.
Record the concealed route with photos before closing walls or ceilings. This can greatly reduce future leak investigation and accidental drilling damage.
Ask what is included, what is excluded, which findings support additional work and how the final result will be tested.
Common mistakes to avoid
- Repainting before fixing and drying the moisture source.
- Blowing a blockage deeper without cleaning the pan and line safely.
- Running a gravity drain uphill or with sagging loops.
- Ignoring damaged refrigerant-pipe insulation.
- Testing drainage for only a few seconds.
- Approving work without asking how the final result will be tested and recorded.
How local conditions change the decision
Equipment model, building use and measured condition remain the primary inputs. Local heat, humidity, salt, dust, access and operating hours then shape the installation and maintenance plan.
Pondicherry
Coastal humidity, salt exposure, dense development and long cooling hours make drainage, outdoor airflow, corrosion condition and service access important planning inputs.
Villupuram
Strong daytime heat and seasonal dust increase the value of correct capacity, clean heat exchangers, protected pipework and practical preventive maintenance.
Cuddalore
Salt-laden air, monsoon moisture and commercial coastal exposure call for corrosion-aware equipment selection, sound mounting and documented inspections.
Chidambaram
Warm humid weather and mixed residential, institutional and business use require realistic occupancy, moisture, drainage and operating-hour assumptions.
Frequently asked questions
Why is water leaking from my indoor AC unit?
Common causes include a blocked or disconnected drain, poor slope, dirty pan, incorrect unit level, failed pump, frozen coil or high condensation on damaged insulation.
Can an AC leak damage a false ceiling?
Yes. Water can stain, soften or weaken gypsum and other ceiling materials. Keep people away from sagging areas and arrange both AC and building assessment.
Can I keep using an AC that is dripping water?
Stop it if leakage is heavy, near electrical points, hidden above a ceiling or causing sagging. Even a small leak should be inspected before damage spreads.
Does high humidity cause AC water leakage?
Humidity increases condensate, but a correctly designed and maintained drain should carry it away. High volume exposes marginal slope, blockage, pump or insulation problems.
Why does my AC wall get wet but the drain flows?
The moisture may be surface condensation from damaged insulation, air leakage around the sleeve, an overflowing pan under higher load or rain entry. Trace the exact source.
How can office AC drainage be protected?
Use accessible drains or pumps, overflow controls, planned inspection, route records and testing before ceilings close and during preventive maintenance.
Talk to Turbo Cooling Solutions
Share the equipment model, site location, operating pattern and exact concern. Turbo Cooling Solutions can inspect the installation or system condition and explain the evidence before recommending work.