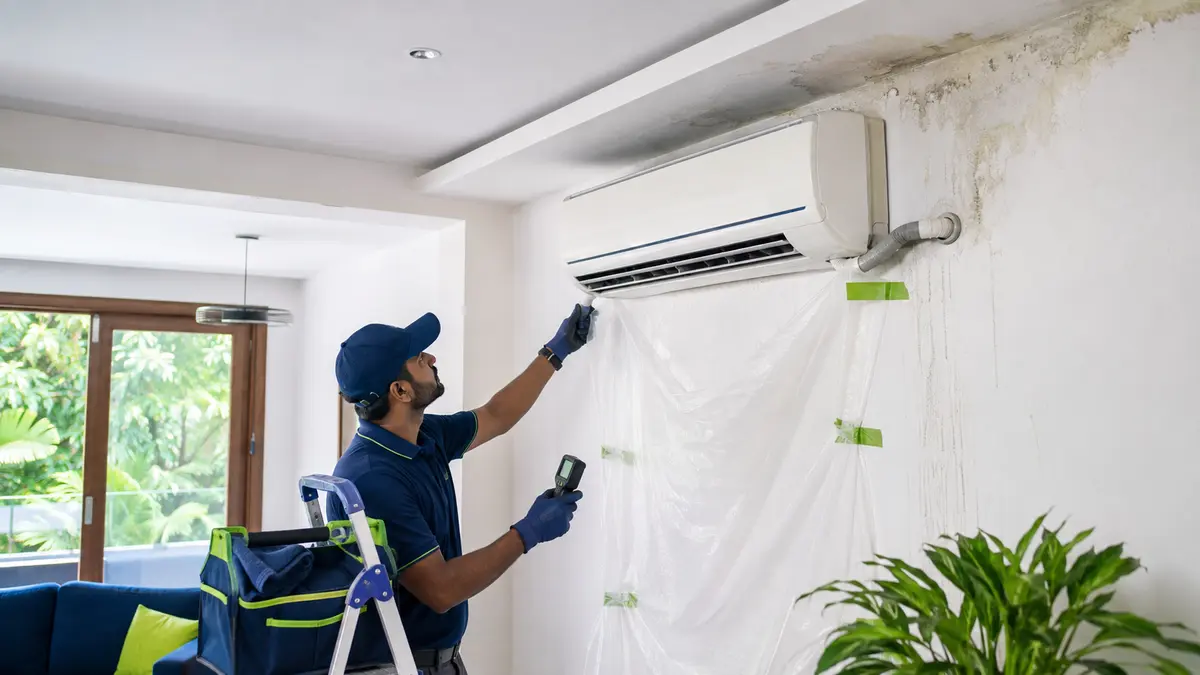
Why is water forming outside the AC drain pipe?
Moisture on an AC drain pipe can be surface condensation when humid air reaches a cold pipe, leakage from a cracked or loose joint, overflow from poor slope or blockage, or condensation from an uninsulated refrigerant line mistaken for the drain. Dry and inspect the route, identify where water begins and correct insulation, joints, slope or blockage rather than wrapping a wet unknown leak.
Trace the first wet point before opening walls
In humid Cuddalore air, cold exposed surfaces can fall below the dew point and collect water. The fix depends on whether water is condensing outside the pipe or escaping from inside it.
Check during normal cooling and follow the route from indoor tray to discharge. Look for gaps in closed-cell insulation, compressed sections, loose joints, uphill runs and damp wall penetrations. Concealed routes may require controlled access and moisture assessment before cosmetic repairs.
Cuddalore has humid coastal exposure, seasonal heavy rain and salt-laden air. Drainage, insulation, outdoor corrosion and water entry deserve attention, but diagnosis must still follow observed evidence.
What to check before approving work
Start with safe, observable conditions and move to model-specific technical tests only when the evidence requires them.
Surface or leak
Dry the pipe and observe whether moisture beads evenly outside or emerges from a joint or crack.
Slope and discharge
Confirm water reaches the intended outlet without backup, sagging or an uphill section.
Pipe identity
Distinguish the condensate drain from the cold refrigerant suction line and inspect both insulation systems.
Professional checks for AC Drain Pipe Condensation
Tray and drain test
Inspect the indoor tray and test flow through the complete accessible route.
Joint and pipe condition
Check cracks, fittings, pump connection where used and wall sleeves.
Insulation continuity
Use suitable closed-cell insulation with sealed joints on cold surfaces.
Building moisture check
Assess wall or ceiling damage and allow drying before repainting or closing access.
Identify the water source before choosing a fix
One symptom can have several causes. Use the pattern, timing and accompanying signs to narrow the next test instead of replacing parts from a guess.
The table is a decision aid, not a substitute for model-specific procedures, safe instruments or manufacturer service information.
| Observation | Possible area | Next check |
|---|---|---|
| Even beads on pipe exterior | Surface condensation | Improve continuous vapour-sealed insulation |
| Water from fitting | Loose or cracked drain joint | Repair joint and flow-test |
| Indoor tray overflows | Blockage, slope or pump fault | Clear route and verify lift/slope |
| Wet refrigerant-line insulation | Cold-line insulation failure | Renew and seal insulation correctly |
Switch the system off when there is burning smell, smoke, repeated breaker tripping, water near wiring or unsafe access. Do not bypass a protection device.
How should the result be verified?
The final test should reproduce the original operating condition as closely as practical and show whether the reported problem is resolved.
Record the work completed, relevant readings, parts used and any remaining limitation so a future visit starts with evidence rather than assumptions.
- Test water reaches the discharge point.
- No joint leaks under flow.
- Cold surfaces have continuous sealed insulation.
- No indoor tray overflow occurs.
- Affected walls or ceilings are monitored after drying.
From first observation to verified handover
- 1
Protect the area
Move items and switch off if water approaches wiring or damages the ceiling.
- 2
Locate the first wet point
Dry and observe drain, joints and cold-line insulation.
- 3
Test drainage
Check tray, slope, blockage, pump and outlet.
- 4
Repair and insulate
Correct the identified defect with suitable pipe and sealed insulation.
- 5
Recheck during cooling
Operate long enough in humid conditions to confirm the route stays dry outside.
Share useful details before the visit
Send the model, AC type, location, symptom timing, settings, error code and a short video where useful. Mention recent cleaning, shifting, electrical work, refrigerant work or power events.
Ask for an itemised scope that separates inspection, cleaning, labour, parts, refrigerant and follow-up tests. Keep the service report for warranty and repeat-fault history.
Ask what is included, what is excluded, which findings support additional work and how the final result will be tested.
Common mistakes to avoid
- Painting over a damp wall before stopping the water source.
- Wrapping insulation over an active pipe leak.
- Blowing a blockage into an inaccessible shared drain.
- Approving work without asking how the final result will be tested and recorded.
Frequently asked questions
Is AC drain-pipe sweating normal in Cuddalore?
Condensation can occur on a cold uninsulated surface in humid air, but repeated wetting can damage property and should be corrected.
What is the difference between sweating and leaking?
Sweating forms on the outer surface; a leak escapes from inside through a crack, joint or overflow. Drying and observation help distinguish them.
Can drain insulation stop condensation?
Suitable continuous, vapour-sealed insulation can prevent humid air reaching a cold surface, provided there is no internal leak or overflow.
Why does the wall stay damp after repair?
Building materials can retain moisture. Confirm the source is stopped, allow drying and inspect for concealed water damage before finishing.
When should I switch the AC off?
Stop it if water reaches electrical parts, the ceiling bulges, the indoor tray overflows or safe access is uncertain.
Talk to Turbo Cooling Solutions
Share your location, AC type and requirement for a clear service response.